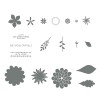
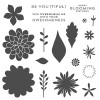
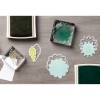
We don't usually feature a brand new set, but we made an exception for convention. Even for a group of our size, 40-50 projects with just one set would have been just a little too limiting :) This is a set that almost all of us ended up getting, and had already been planning to get, and it had those wonderful coordinating framelits! Then, right before convention, the MDS version came out too. Be still my heart!
Blog Roll please!
- Mike Funke stampin-style.typepad.com
- Betty Traciak kittystamp.blogspot.com
- Kerry Willard Bray peoniesandpaperchains.com
- Wendy Weixler wickedlywonderfulcreations.blogspot.com
- Tanya Boser tinkerin-in-ink.blogspot.com
- Nancy Smith iguanastamp.wordpress.com
- Heidi Baks runningwscissorsstamper.blogspot.com
- Dawn Tidd tiddbitsfromdawn.typepad.com
- Lisa Young addinkandstamp.blogspot.com
- Holly Krautkremer rubberredneck.typepad.com
- Yapha Mason yaphamason.com
- Debra Burgin heartfeltinkspiration.com
- Jill Coleman jillstamps.typepad.com
- Adriana Benitez escape2stamp.blogspot.com
- Beth Beard mylittlecraftblog.com
- Shana Gaff stressfreestamping.blogspot.com


A question for all of the wonderful Stamp Review Crew members: "What do you do to achieve a good inked image of the large solid image of this stamp set?" Some of us are struggling with this. Thank you for your help and inspiration.
ReplyDeletePersonally, I set the stamp on the inkpad and then apply light pressure until I can see that the surface is covered in ink. No tap, tap, tap like you would with rubber. Now, I don't mean mash it into the inkpad, but gently press it into the pad, not just onto the pad.
DeleteI hope this helps :)
Thank you, Tanya. I'm getting much better images using your advice. Hard to break that tap, tap, tap habit!!
Delete